Good Dog
Blog
We’re here to simplify dog training for busy families—because raising a well-behaved pup shouldn’t feel like a full-time job!
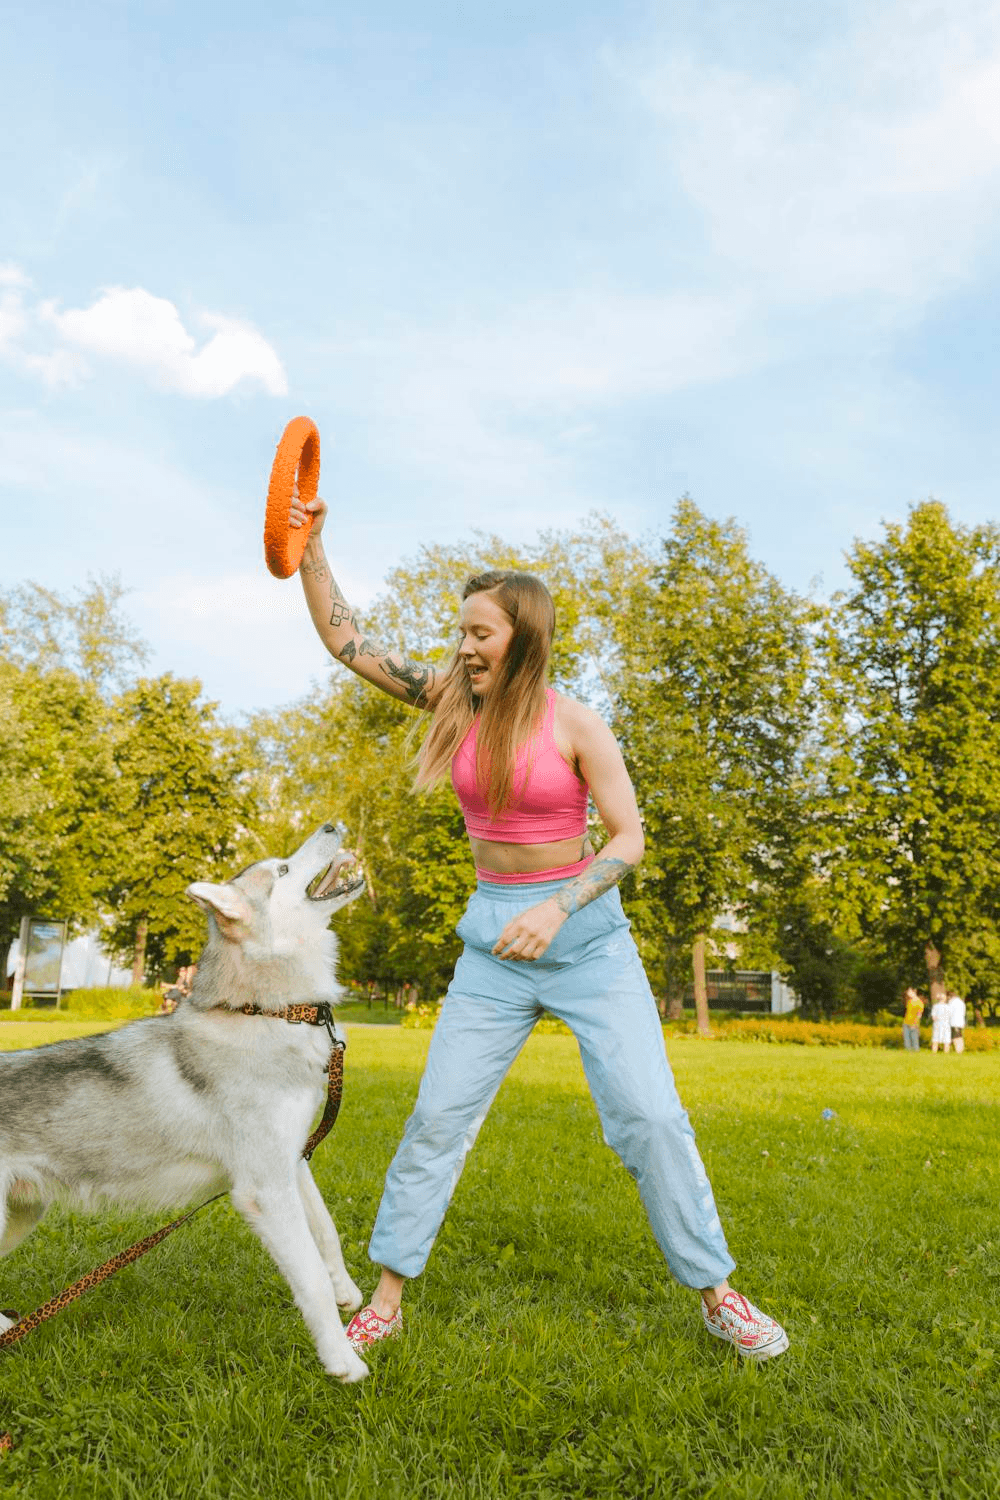
Teach Your Dog Drop-It Command
2023-02-07What you’ll need: Quiet area Lots of soft tasty treats Toys
How to make it happen:
Start by training Drop-It on cue by first teaching your dog with nothing in their mouth.
Say your cue, “Drop It” and toss a few soft treats on the ground in front of your dog. Use soft treats so your dog cannot hear the treats hitting the ground.
Reach down to point out the treats you tossed down. This is an important step as it will get your dog use to you reaching down in front of them to retrieve an item they dropped. Also, make sure to focus on the order in which you say the cue then throw the food on the floor. Only give your cue before you toss treats on the floor, not at the same time.
Practice doing this not only standing in front of your dog but also vary your position. Practice while sitting down, standing with your back to your dog, sitting on the floor, while removing your coat, pushing a stroller, carrying boxes, taking out the trash, and so on. This is also good to practice with your dog already on their bed or in their crate.
As your dog eats the treats on the floor, you should also give lots calm praise and petting to get your pet use to you being around them in this scenario.
You are ready for the next step once you say the cue and your dog responds by looking at the floor before you even toss any treats down.
Next, start by training around an object. The first few objects you use should be things that your dog is not very interested by, or at least something your pet will not try to mouth. Your pet should have little to no interest in the object you are training around. Wait for your dog to look at the object. As soon as they do, say your cue, “Drop-It” and toss treats on the ground away from the object.
The next step is to start to practice with toys. The first couple of toys you use should be ones that are not too exciting for your pet. Continue these steps and gradually increase the difficulty of the toy by using ones that are more enticing to your dog.
Regardless of your dog’s behavior, continue to toss treats the second after you say the cue “Drop”. It is extremely important to build your dog’s association of saying the word drop and dropping whatever they have in their mouth at that moment.
Continue to point out the treats you drop to make it rewarding for your dog to find them. This will help you be able to take away the toy without much excitement. In the start of training, do not always take away the toy your dog dropped. You want to allow the dog to continue to play with the toys randomly so your dog does not begin to think “Drop-it” means you are taking their toys away.
If at any point during training your dog does not drop the item when asked, move away and toss lots of treats on the ground. Wait until your pet drops the item and say your cue as your dog drops the item and goes for the treats. Try to make the treats more fun than the object itself by tossing them around a bit. Totally ignore the object your dog had as to not make the toy or object equally or more rewarding than the treats. If this happens, you have most likely moved too far ahead too quickly. When you try again, go back a couple of steps to help further strengthen the association of drop it.
Plan compiled from Chirag Patel; Domesticated Manners
Surviving Nipping and Biting Puppies
2023-02-07A puppy explores the world around them with their mouths. Unfortunately for humans, those sharp teeth hurt! In order to teach our puppy that nipping and mouthing is inappropriate we have to be very consistent in not allowing our hands to become chew toys. We should not encourage rough play, or games like slap boxing. The first step is to make sure your puppy has sufficient mental and physical stimulation. Going for long walks, obedience, trick training, treat dispensing toys, food puzzles of varying degrees of difficulty, and games like fetch or tug should all be used to help tire out your dog. Additionally, there are also a few exercises you can practice while you play with your puppy.
Apply the '5-Second Rule' to Petting: When working with a dog who regularly engages in nipping and mouthing, count to 5 seconds when you pet them. If the puppy shows any sign of discomfort or is not calm and relaxed, you should immediately stop petting them. Once your dog can remain relaxed and not get over aroused for those 5 seconds, stop petting. If they respond by giving you eye contact, pawing or nuzzling your hand or doing anything other than mouthing your hand, they are politely asking you to keep going. Continue petting the dog for another 5 seconds and repeat the exercise.
Teach an Alternate Behavior:
- Begin by putting about 10 pea-sized treats in the hand opposite from the one that you use to pet the puppy.
- Sit on a chair near the puppy.
- Then reach over and pet him one time.
- Before the puppy begins to nip, immediately present your baited hand (the hand with the treats in it) to the puppy and food lure his attention away from the hand you just petted him with.
- As the puppy is turning his head away from the petting hand to follow the baited hand, click and reward with a treat.
- It will not take long for the puppy to begin responding to being petted by looking at the hand that is not petting him. Once he does, reward him with a treat or a toy.
- Gradually increase the amount of time you spend petting the puppy before offering a treat or toy.
This exercise teaches the puppy an alternative response to being pet. Most puppies will find being pet as a rewarding experience however, not all dogs enjoy being pet. This exercise can teach a dog to tolerate being pet and possibly learn to enjoy the tactile as a reinforcer.
Redirection: You should only pet a nippy puppy when they are calm, tired, or preoccupied with a chew toy. By only petting the puppy when they are least likely to nip or mouth, you have the chance to reward the absence of the nipping behavior. A puppy who is already chewing on a satisfying object is much less likely to nip or mouth. With a puppy's short attention span they will typically get tired of one toy rather quickly and go right back for your hands or feet so remember to greet your puppy with more than one toy available especially during playtime. If at any time should your puppy begin to nip at your hands or feet, you should immediately give your No Reward Marker and remove your attention. If they are persistent, remove yourself from the area or room entirely for about 30 seconds or until they calm down.
Inappropriate Chewing: Puppy proofing is a must! Remove any inappropriate objects that your puppy can access. If you are unable to watch your pet very closely, they should be confined in an exercise pen or crate so they cannot sneak off and chew up something they shouldn't have. Make sure you also have plenty of toys available so your puppy can occupy themselves. If at any time you catch your puppy chewing on an appropriate toy, make sure it doesn't go unnoticed.Give them calm praise or petting but try not to distract them from their toy. You can also put your puppy's toys in rotation so they won't get bored from the toys they have at their disposal every single day. Treat dispensing toys and stuffed Kong’s will also keep your puppy's attention for a longer amounts of time and help stimulate them mentally. If you happen to catch your puppy chewing on something inappropriate, immediately give your no reward marker and replace the inappropriate object with something your pet is allowed to have. It can often be helpful to replace the inappropriate object with something of a similar texture. If it is something that the puppy routinely chews that you cannot move such as the baseboard or a table leg, consider using a chew deterrent like Bitter Apple Spray, Chew Guard or cayenne pepper.
Teething: Most puppies just want to chew on something to make their gums feel better. There are many chew toys on the market that are made for teething which are rubbery and soft. You can also soak a rope toy in cold water which can help alleviate some of the pain.
Training Puppies How to Greet People
2023-02-07Puppies often jump up in an attempt to smell our breath, lick us and elicit attention. When they are puppies, people often find it cute! However, your puppy is going to get bigger and stronger as they grow, which means when they jump up, it can evolve into quite an issue. Every time you reward your puppy by giving them attention, they are learning that jumping up on people is a great way to say “Hi”. To teach your puppy a better way to greet you and your guests, follow the steps below.
What you’ll need: 4-6 foot leash attached to an appropriate collar or harness Lots of extra tasty treats Helper (Someone to be Greeted) Patience, Practice, Persistence and Praise!
How to make it happen Greeting You:
Start by practicing at the door or wherever your dog greets most people.
Walk in the door armed with a handful of treats. You can already anticipate your dog will likely jump on you to say hello! Prevent this by immediately tossing several treats on the floor in their direction. Doing this, you can redirect their initial enthusiasm. The moment your dog stops and goes for the treats mark and then toss a few more in their direction. You are marking the fact that your dog stopped their forward progress towards you.
When your dog goes to greet you after chasing and eating their treats, immediately mark as they approach. Here you are marking that they are keeping all four paws on the ground as they greet you.
When your dog does jump up, say your No Reward Marker (“Eh-Eh”) and turn your hip into the dog. Looking, talking, touching and motioning to, ALL REWARDS BEHAVIOR. Do not say anything else except your no reward marker once your dog jumps up. As soon as all four paws are on the ground, pay attention to them!
You can also mark and reward all impulse control as well. When your dog does that quick little stutter-step but keeps all four paws down instead of jumping up, mark and reward! This time we are marking the fact that your dog made the decision to not jump and instead, they tried to compose themselves.
Eventually your dog will begin to sit in anticipation of a treat, attention or a valued toy! Delay your reward marker during the greeting until your pet offer to sit instead of jumping as they improve with impulse control.
You can also use a gate to give you some extra control during the greeting with your dog on the opposite side. Approach the gate. If your dog jumps up, stop moving or take a step backwards. Once your dog has all four paws on the floor again, continue to approach the gate. If your dog sits, or continues to keep four on the floor, you can mark and reward by tossing a treat behind them, giving you a chance to reset the exercise and reward four on the floor or sitting once they re-approach you at the gate.
Practice! Consistency is always the key. Make sure that anytime your dog jumps up when they are not invited to, do not give them any attention.
Greeting Guests (Here's where your helper comes in handy!):
Set up a tether near the front door. Have a container of treats ready as well as your reward marker!
Invited a friend over to help you practice. Have a pizza/dog training party as enticement for your friends and family to come help. Let them know that the goal is for your dog to keep all four paws on the ground during greetings with people. This means that if at any time should your dog jump, they should remove all attention, turn away or even step back outside.
Have your friends knock or ring the bell. Your dog will likely run barking to the front door, calmly follow him. Bring your dog over to their tether and leash them up. Then move yourself into a position so you are between the dog and the door with your back to the dog.
Wait until the dog calms down a little. He will likely do this because positioning yourself between him and the door you have shown him you are taking responsibility for the situation. This is referred to as “splitting” and dogs will often do it with each other to avoid conflict or to make clear that one dog will handle the situation.
Grasp the doorknob. Open the door a few inches at a time, stopping every time your dog barks or lunges. Stand still until your dog is quiet again.
As you allow your guests to enter, make sure that your dog is not jumping or lunging, if they do, instruct your guest to take a step back and wait about ten seconds before trying again.
When your guest approaches and your dog is able to keep four paws on the floor, mark and toss some treats and give them attention. You can also have your guest reward your dog with some treats and attention as well.
Do this several times so your dog learns that calm behavior is what gets him rewards and attention. Practice this with as many different people as possible. The more people you practice with, they better your dog with generalize this behavior with anyone you allow into your home.
Training Tips: Practice with Mock Guest set-ups. It will be helpful to introduce the tether beforehand, giving your dog lots of treats and attention when they are not pulling on the tether. Go through the same steps as greetings people but without a guest at the door.
Practice obedience cues like Sit, Down, Stay and Targeting around the entrances to your home to help your dog respond to cues in those problem areas. If you are unable to actively train when a guests comes over, place your dog in their crate or away from the entrance so they cannot engage in any unwanted behavior like jumping. Looking, talking, touching or motioning to, all rewards behavior. If your dog continues to jump, eventually someone will pay attention to them. Be sure to instruct anyone who greets your dog to pay no attention to them when they try to solicit attention by jumping. Dogs learn by association. If they are allowed to jump on their owner to say hello then they will do the same thing with a small child or even an elderly person. Games like Go Wild and Freeze can help increase impulse control. Practice makes perfect!
Teach Your Dog Wait Command
2023-02-07What you’ll need Food bowl Your dog’s food Patience
How to make it happen Start to practice where you feed your dog. Place several bits of kibble in their food bowl and ask your dog to sit.Once your dog is in the sitting position, say your cue, “Wait” and slowly begin to lower to food bowl to the floor.Continue to lower the bowl as long as your dog remains in the sit position.If at any time should your dog move out of the sitting position, give your no reward marker (“Eh-eh”) and abruptly raise the food bowl back up. Your dog should respond by returning to the sit position. Once they do, continue to lower the food bowl down towards the floor.If your dog begins to get impatient and starts to jump or bark trying to get their food, simply give your no reward marker once more and calmly leave the area and take the food bowl with you. Once your dog calms down, try again.
Continue this until you can lower the food bowl all the way to the floor and stand up, and take one step away.Once your dog can do this, give your release cue (“Okay!” or “Break!”) and allow your dog to eat the kibble in their bowl.
Make it more difficult by moving further away from the food bowl before releasing your dog to eat. You can practice stepping away and turning your back to your dog, spinning in a circle, or even while dropping an object.
Training Tips Continue to practice this during each and every meal time to increase impulse control and patience for your pup.
Practice this exercise with different treats and high value toys to help generalize this behavior. You should also practice this in different areas of your home as well.
“Stay” versus “Wait”- be consistent on which you use and when. “Wait” should only mean “Do not move forward” and the Wait cue can be used for entering a room or waiting to get a valued toy, object, meal or treat. “Stay” means to hold a particular position, like sit, down or stand, for a set amount of time before being released.
Practice this same routine at doorways, opening the door slowly as long as your pup can stay in position before giving your release cue “Okay!” and allowing them to follow you out. If they break the wait, give your no reward marker and close the door and step away. You can practice at the end of a sidewalk before crossing the street as well!
Obedience Strengthening Game Puppies
2023-02-07Intro to Stand With the puppy in either the sit or down position, present your baited hand one to two inches above the dog's nose. You may shake it a bit to encourage the puppy to follow the lure. Slowly bring your baited hand at an upward angle, keeping your puppy's nose following the lure. Your dog will begin to stand up. Once your dog is on all 4's give you reward marker followed by a treat. Repeat this until the puppy follows the lure 90% of the time
Introducing the Cue Once your dog follows the lure 90% of the time, use an un-baited hand to lure your puppy. Start by asking your dog to sit or down. Then present your un-baited hand a couple of inches above the dogs nose and say “stand” as you begin to lure the dog into position. Once your dog is on all four feet give your marker followed by a treat from the hand opposite then you used as the lure. If your dog does not stand when you give the cue, go back to kindergarten and use a baited hand.
Puppy Push-ups Now that we have sit, down and stand, we can work on randomizing the order they are presented. This will help the dog understand to listen of what is being asked as well as helping with impulse control.
Beginning from Sit Position Give the dog the following cues; Sit, Stand, Sit. Once the dog has successfully completed this small sequence, give the Reward Marker followed by the Reward.
Beginning from the Down Give the dog the following cues; Down, Sit, Down, Stand. Once the dog has successfully completed this small sequence, give the conditioned reward marker followed by the reward.
Beginning from Stand Give the dog the following cues; Stand, Sit, Stand, Down. Once the dog has successfully completed this small sequence, give the Reward Marker followed by the Reward.
Teach Your Dog to Sit
2023-02-07Capturing- any time your dog sits on their own, give your reward marker and give them a treat, lots of pets, a valuable toy or verbal praise.
Luring into Sit:
Bring your pet into a quiet area with little to no distractions.
Bait your hand with an extra tasty treat without letting your dog see you do so.
Present your hand just above your dog's nose. As your dog starts to sniff the treat, slowly raise the treat back over their nose and up between their ears; this will cause their head to tilt backwards. As their head tilts back, their back end will fold into a sit.
The moment your dog's rump touches the ground, give your reward marker and pop a treat into your pup’s mouth. When luring your dog into position, if at any time should their nose fall away from your hand, immediately say the No Reward Marker (“Eh-eh!”), pull your lure hand away and stand straight up. We are not punishing our dog because they did not sit, but because they did not follow our lure. Wait a couple of seconds and then try again.
Repeat this until your dog can reliably follow your lure hand into the sitting position.
Once your dog is in the sitting position, say your Reward Marker and but begin to deliver the reward from the opposite hand you used to lure them into position.
At this point you are ready to add your cue. Say “Sit” before you begin to lure your dog into position. Repeat this several times.
Begin to vanish your lure as quickly as possible. We do not want to teach our pet to only follow a hand with a treat inside of it. Start by trying to lure your dog into position without a treat in your lure hand. If they follow your lure hand without a treat inside into the sit position, great! Continue to mark and reward with your opposite hand.
Start to physically lure your pet less and less each time after your give your hand signal or verbal cue of “Sit”.
As your pup improves, you may begin to reward sitting on a random basis. Maybe the first sit doesn't get a treat, but perhaps the second or third one does. Faster responses and listening to the cue around distractions should always be rewarded with lots of treats and praise in the beginning. Continue to practice in a wide variety of different situations and environments. Try to keep distractions to a minimum when first working in new areas. Training Tips- Only say the cue “Sit.” one time! Do not repeat the cue.
If at any time should your dog regress during training, go back to step 1 to see where exactly they may have gotten confused.
It is important to work in low distraction areas to build the reliability of the behavior on cue before working around distractions.Increase your pup’s response time to your cue by applying a 'Limited Hold' rule. Start to only reward your dog when they sit within a set time frame after you give your cue. Start with 3-4 seconds at first. When your dog succeeds every time during your 'Limited Hold' rule you may raise the criteria and only reward faster sits.Gradually build the length of time your dog can hold the sit position by withholding your reward marker for a couple of seconds at a time.
Help Your Dog Focus with This Game
2023-02-07A great, fun way to get your dog to give you more focus as well as introducing clicker training and weaning off treats. All dogs learn at different paces so the scheduled days are just a suggestion. If you have an attentive Border Collie then you may be able to fast forward in just a few quick sessions. If you have a new rescue puppy who doesn't even know you then you may want to expand it to a few weeks.
**Days 1-2: ** Mark and reward every time the dog pays attention to you on his own. Use the clicker or verbal marker to pinpoint any glances your way, and give a great reinforcer. Try to mark the exact instant your dog starts to turn his head toward you, so that you are rewarding the choice of turning his head.
If you're not going to train for a while, give an All Done signal. When you're ready to train again, say his name and click/treat the turn toward you.
In quiet places like the living room, you can reinforce with your dog's kibble. Offer better rewards when your dog looks at you around distractions. Dogs deserve 'hazard pay'.
When you are using a clicker as the marker, attach a key chain wrist coil to it so the clicker is always at hand. You can swap back and forth between the clicker and verbal marker, so use whichever one is available first. The click is more memorable to the dog, so use that when you can. Don't forget to praise your dog after you mark her glance.
For this and all of your training, vary the type of reinforcer and where it comes from. Mark and then pull a hidden toy out of a tree or off a shelf. Mark and pick up a stick to toss. Mark and play a game of chase (dog chasing the human). Mark and run to the kitchen together and grab a treat from your refrigerator. It helps to match the type of distraction the dog was looking away from, so that looking away from food gets them food, looking away from a toy gets them a toy, etc.
**Days 3-4: ** Mark and reinforce the best look out of every two. We are now weaning off the treats a little. That doesn't mean you aren't reinforcing attention. Continue to praise or at least acknowledge your dog for checking in.
Every time you mark, you still reinforce; you just won't be marking as much.
Get a little picky- click for the faster head turns, longer glances, or whatever is somehow 'above average'.
Days 5-7: Wean off of the treats Mark and reinforce on a random schedule, for about one-third of the responses. Try to mark the best responses. Reinforce by just paying attention and/or praising the rest of the time. Gradually shift to a one in four schedule, then one in five. Change the reinforcement schedule slowly, so that your dog won't suspect the odds are getting longer.
The Lassie Protocol is great to do during the first week of training along with using Mark and Move on walks. Do it again whenever the dog needs a refresher, like when you have a baby, get another dog, or move to a new home.
Fear versus Aggression in Dogs
2023-02-07When a dog becomes fearful it is likely there has been a negative association created to a specific stimulus or a mass variety of stimuli. It is extremely important to not rush a fearful dog or to use force to get them to comply, this could cause a nervous or fearful dog to respond with one of these stress responses; flight, fight, freeze, fiddle around, or faint (rolling over submissively). If you observe any of these 5 responses you should immediately stop what you are doing and try to analyze what you can do to help the dog.
Common indicators of stress: Ears pinned back (sideways for a dog with straight ears) Tail tucked Excessive drooling Excessive panting Refusal to eat Sudden shedding and excessive dander (blowing coat) Lowered body Corners of the mouth are tight Holding their breath Crescent moon eyes Dilated pupils
Cut-off or Calming Signals: Yawning Licking lips Puffing Shaking off Sniffing the ground Scratching Turning or looking away from the stimulus Moving slowlyWhen a dog displays these behaviors they are usually trying to self soothe. You should reward these requests by providing space for the dog and moving away from whatever is causing the dog stress.
Ways to alleviate stress include: Stop what you are doing and take a break Break down the exercise into smaller steps Remove the dog from the environment Use barriers so the dog is unable to see the stimulus Redirect the dogs attention
Do not pet or try to soothe the dog if they are displaying stress signals. This will only encourage the behavior to continue. Only reward cut-off signals using praise, treats, affection and toys once the dog disengages. A fearful dog will lunge and/or bite if provoked to provide itself with space. Going slow and reading the dog's communication will prevent this from escalating.
What does aggression typically look like? There are two kinds of aggression and ways to see it through a dog’s body posture. They are both typically paired with certain stress indicators as well.
Important! Once a dog utilizes aggression (barking, lunging, biting, guarding) and they are successful in achieving what they wanted, typically space, a dog will always use it again at some point.
Offensive Threat Posture Tail up and stiff Hackles up Standing tall and forward on toes Ears forward Corners of the mouth forward Wrinkled nose
A growl typically goes along with this posture. A dog displaying offensive threat posture will typically bite at the slightest provocation. Avoid physical corrections. These will more than likely cause the dog to redirect onto the handler or increase the aggression. Avoid collars that constrict or cause pain. These will only create a negative association or reinforce the negative association. With this type of dog it is best to use treats to regain focus through basic obedience.
Defensive Threat Posture Hackles up Tail tucked Ears back Pupils dilated Nose wrinkled Corners of the mouth back Body lowered
During the defensive posture, the dog is being self-protective. This is typically more of a fearful dog that is unable to get out of the situation, but will react to create space. Avoid physical corrections and anything that causes pain. Use food rewards and calm praise to empower a fearful dog’s cut-off signals.
Indicators a dog may bite include: Direct eye contact Tail straight up and stiffly wagging Chest pushed out Standing with legs wide apart Ears up Low rumbling growl Hackles up Dog freezes or holds its breath
_Important: Not all dogs will show signs they are about to bite. Many dogs have been taught to suppress their warning signs by being “corrected” when they growl or show their teeth.If ANY of these behaviors are being shown follow this list of “Dos and Don'ts” _ Do Approach Slowly and not directly (curving) Keep hands low and nonthreatening Talk calmly Observe for posture and stress signs Be aware of all your actionsAvoid direct eye contact Yawn and stretch your arms downwards repeatedly
Don't Move quickly Lean or tower over the dog Yell or shout Reach over your head/shoulders Force yourself onto the dog Make direct eye contact Approach if you're uncomfortable
Leash Reactivity Typically caused by frustration because the dog is unable to greet or reach another dog or person. Many owners use physical corrections which cause this problem to worsen. The corrections will often create a negative association just based on the approach of another dog or stranger. Lunging, barking, growling, fixating and whining are all signs of a dog that is “over-threshold”. If they display these behaviors you should get the dog away from the stimulus as soon as possible.
Teach Leave-It Command to Dog
2023-02-07If trained properly you can use this to ask your dog to not eat trash on a walk, chase a cat, or even investigate something off limits.
What you'll need: Lots of tasty treats or other reinforcer Consistent Reward Marker 4 P's- Patience, Practice, Persistence and Praise 3 F's- be Fun, Fair and Flexible
Practice in 5 to 15 minute sessions 2-5 times a day. Start in a quiet area with little to no distractions.
To Begin:
- Put a small treat in one hand without letting your dog see you do so.
- Close your hand into a fist with the treat inside.
- Present your fist just above the dog's head to one side and wait for a long second.
- The moment your dog looks away, turns away or looks up at you, mark and reward with a treat from your opposite hand while saying “take-it”. If the dog is persistent and will not look away from your baited hand then give your No Reward Marker ('eh-eh' or 'oops') and remove your hand then try again.
- Repeat these steps until your dog looks away every time you present your hand. Once he does this reliably then we add the cue of “Leave-It”. 6. Give your cue “Leave-it” at the same time you present your baited hand and repeat steps 1-4 for a few additional sessions. Never say the cue more than once.
Remember: consistent use of the reward marker to pinpoint the moment your dog looks away or moves away from the bait. Always jackpot perfect performances like looking or moving away immediately or moving further away. In the beginning the treats you use as rewards should always be better than the ones you are asking your dog to leave alone. Also, never give your dog the forbidden treat.
Raising the Bar:
- After you add the cue to the least enticing bait, make it a little more challenging by keeping your hand open with the treat visible to the dog. This is a little more enticing for him.
- Present your open hand with the treat in it to the dog.
- When your dog turns away, looks away or looks at you, give your marker and say “take-it” as you reward from the opposite hand. If your dog makes any forward progress towards the forbidden treat, immediately close your hand and give your no reward marker. If the dog is still persistent about getting at the treat in your hand then give your no reward marker again and calmly but abruptly leave the training area for a few moments.
- Repeat the steps as you make the forbidden object more and more enticing and easier for the dog to reach. You can test his knowledge of the cue by switching hands before eventually reaching the point of putting the treat or object on the floor.
- Keep it interesting! With plenty of practice by this point you should begin practicing Leave-It with a wide variety of forbidden objects. Start with random, insignificant objects like a bicycle helmet or a plastic cup before asking your dog to leave alone more enticing objects like a child's toy. Anytime your dog gets something they shouldn't have, practice this exercise to teach your pet whatever the object is, it is forbidden. Once you are ready to use this cue to have your dog not bother other dogs or people, it is extremely important you have properly socialized your pet beforehand.
Training Tips Make sure to follow the entire program with each new object so you do not build a negative association with the things you're asking your dog to leave alone.
Anytime you make it more challenging, use higher value rewards than the forbidden object.Leave-it should be used to teach your pet that something is off limits. Use this game with paper towels, pens, shoes, baby toys, garbage, human food and anything else your pet is not allowed to have.
Leave It - Do not allow the dog to approach the treat after the Leave-It cue has been given. You do not want to teach the dog that “Leave It” means to ignore it just for a second then rush in to take It.
Take It - Remember to always bring the treat to the dog when you say “Take It.” The biggest mistake people make when they start presenting their open hand is pulling it away as the dog tries to grab the treat. The dog will not learn to back away if you do this. Watch closely to see the dog learning to back away each time you say “Leave It.” Also, make sure you are giving the Leave-It cue as you present your hand. It is too late for the dog to stop her forward movement if you present your hand first and then say “Leave It.”Drop-It - teaching your dog to drop whatever they have in their mouth Leave-It – teaching your dog that something is off limits and forbidden. Once you teach your dog to leave something, make sure to limit their access to the item(s) so they do not learn they can ignore your request. Critical in Anti-Counter Surfing.
Teach Your Dog to Stay
2023-02-07Stock your pocket/treat pouch with extra tasty treats without letting your dog see you do so.
Bring your dog to a quiet area they are comfortable in with little to no distractions.
Ask your dog to either sit or down.
Ask your pup to stay by either giving the verbal cue “Stay” or by holding up the palm of your hand about six inches to a foot in front of your dog’s nose.
Once your dog is in position, count to five. If your dog remains in position for 5 seconds, mark then give your Release Cue (“Okay!”) before rewarding your dog for staying in position. Make sure to give lots of praise as well!
Slowly lengthen the amount of time you are asking your dog to remain in position. Work in increments of seconds at first. Slowly increase to minutes.
Work on each piece of criteria separately: duration (how long the dog remains in position) distance (how far away you are from your dog) distractions (your dog stays perfectly still, no matter what is going on around him.)
Once your dog can stay for at least 30 seconds, practice getting them to stay under different conditions. Click and treat your dog for staying while you are sitting, standing, lying down, standing with your back to the dog, putting on your coat or shoes, looking for your car keys in your coat or purse, getting out your treats, and so on. Work on as many positions as you can thing of so your dog understands “stay” means “stay,” no matter where you are or what you're doing.
Now that your dog’s “Stay” is getting more reliable, start practicing the stay behavior in several different locations. Remember to “go back to kindergarten” initially in each new environment, and work on each criteria separately (duration, distance, distraction).
As your dog continues to progress, you can start asking your dog to stay while you walk one step away, two steps, and so forth. Do not say your cue more than once. We want to be able to ask our dog to stay, then turn around and walk away. Practice like it is real life. Do not say, “staaaaayyyyyy, staaaayyyyy!” while hunched over, moving away from your pet. You will likely never do that while in public. Keep it simple! Give your cue one time, then practice moving away. Remember to say your reward marker once your pet has completed their stay, then give your release cue before rewarding your dog.
To fade out the reward marker and wean off of treats, simply give your Release Cue once your dog has completed stay. Remember to always give lots of praise after the release cue!
Begin to use different rewards for your pup after giving your release cue. Now that Stay is a known behavior, the release cue is the reward! You can have your dog stay for toys, their meals, being let outside, or a delicious chew toy!
Training Tips: Be consistent! When you ask your dog to perform a specific behavior, make sure your dog does just that. For example, if you are working on sit/stay and your dog sinks into the down position, cue your dog to sit again, and get him back up on his feet by walking toward him. Never pull them up by the collar or scruff. Again, ask for a sit. If your dog is confused, break “sit” down into smaller steps until it is more reliable. Inconsistency reduces reliability in high distracting areas.
Click and feed at the end of the stay only.
Vary the amount of time you ask your dog to stay for.
To build your dog's confidence, ask him to stay with his back to a variety of distractions, for example, kids, other dogs, traffic, etc.
“Wait” vs. “Stay”- be consistent on which you use and when. “Wait” should only mean “Do not move forward” and the Wait cue can be used for entering a room or waiting to get a valued toy, object, food or treat. “Stay” means to hold a particular position, like sit, down or stand, for a set amount of time before being released.
Strengthen Dog Response Come When Called
2023-02-07Get your puppy's attention by calling their name or making a few kissy noises, encouraging them to come to you.
Once you have their attention present an open hand, palm up, directly under the puppy's nose for a long second and wait. Do NOT move your hand.
The moment they touch their nose to your hand, mark and reward with a treat from your opposite hand. If the dog does nothing, say the No Reward Marker and remove your hand. Wait a couple of seconds before trying again. If still your puppy does not respond by touching their nose to your hand when represented, try marking and rewarding any movement towards your hand such as looking at your hand or stepping towards it.
Continue to repeat this until your puppy touches your hand with their nose 90% of the time when your present it under their nose.
Present your open hand again under the dog's nose. While your pet is already reaching to touch your open hand say the word “Touch” just before your pet makes contact. The moment your dog touches your hand, say your reward marker and give them a treat from the opposite hand they touched. Continue to do this about 10-20 times to build the association of the cue and the behavior.
Next, say the cue “touch” at the same time you present your target hand. If at any time your dog does not touch when you say the cue, say the No Reward Marker and remove your target hand.
Slowly raise the difficulty of the behavior by presenting your target further away from your puppy. Always remember to mark the instant your dog’s nose touches your hand. Never move your hand towards the dog as they go to touch your hand. We want our pet to be the one to initiate contact. If your puppy only gently touches your hand, do not give your reward marker. Now that Targeting is a known behavior, we only want to mark better than average performances like sprinting towards your hand, touching perfectly in the middle of your palm or listening to the cue around distractions, all deserve jackpot rewards! If your dog doesn't comply 90% of the time, you have probably moved too far ahead too quickly. Break the exercise down into smaller steps by going back a few steps and making it a little easier.
Training Tips: When you present your hand, make sure to keep it perfectly still in the beginning. We want to teach our dog to go all the way to our target and initiate contact.
Mark and reinforce perfect performances with jackpots to shape the behavior to be more reliable.
Practice having your dog do two or three touches before getting the reward.
Slowly introduce distractions at a distance. Touch can be used to keep your dog's attention when passing by other dogs, squirrels, or people.
If the behavior regresses at any time, go back to step one and practice in a quiet and low distraction area so you can see exactly where you or your dog may be confused.Targeting can be used to introduce a multitude of different behaviors like Recall, Spin, weaving between your legs, crawl, etc. You can also increase the duration the your pet touches the target to help with holding still for vet visits, grooming, and so on. You can even introduce targeting to work on having your pet touch different objects, other dogs, or people to help conquer fear or just to have fun!
Teach Your Dog Down Command
2023-02-07Bait your hand without letting your dog see you do so. Ask your dog to sit. Once they do, present your baited hand just below your pet’s nose and encourage them to touch your hand with their nose.
Once their nose is 'stuck' to your baited hand, begin to lure your dog by slowly moving your hand downwards into their chest towards their front paws. If your dog's nose falls away from your hand, or if their butt rises off of the ground, say your No Reward Marker (“Eh-eh!”) and stand straight up, taking the chance of a reward away. You're not punishing your dog for not lying down, but because they didn't follow the lure. Once you have lured your dog's nose all the way to the ground, begin slowly dragging your hand along the ground away from the dog. This shape will resemble an 'L'. When luring from a stand, present your baited hand to your dog's nose and slowly down into their chest and towards the ground at a diagonal, causing their rear half to fold backwards.
Your dog is considered “down” once their rear end and elbows are both on the ground.
- The instant your dog is in the down position give your Reward Marker then place several treats on the ground between your dog’s front paws. Placing treats on the floor increases the association of lying down, and receiving treats from the ground instead of from your hand. By placing several treats between their paws, it gives you more time to stand up and step away before giving your dog their release cue.
If at any time should your dog get out of position before you give your marker, say your No Reward Marker, remove your lure hand and wait a moment, your dog should offer either the Sit or Down behavior again. Repeat these steps until your dog can hold their “Down” for longer and longer periods of time.
Continue to practice this until your dog will consistently follow your baited hand into the down position.
Immediately begin to fade your lure by rewarding your dog from the hand opposite you used to lure them into position. Your pet will start to associate that they follow one hand, but the rewards are coming from the floor between their paws.
Next, try having your dog follow your lure hand into position without a treat inside of it. Your pet will most likely be so use to following that hand they will gladly follow it anyways.
Next, we are ready to add the cue. Say the word “Down” before you begin to lure your dog into the position. Repeat this multiple times. Your dog will start to anticipate that the word Down means to lie down.
Increase the duration of down and add eye contact by placing several treats between your dog's paws and then stand straight up. Just before your dog finishes those treats, say your marker again and place several more treats down between their paws. After your dog finishes the second or third round of treats they will most likely look up at you as to say, “Hey! I'm still laying here, where are my treats?” This is awesome! Mark your dog for lying down while making eye contact, then place more treats in the same place as before. Slowly increase the time your dog holds down with eye contact by withholding your reward marker for a couple of seconds. Gradually increase the amount of time your dog will lay down and wait for that first marker.
Continue to fade your lure by starting to point to the ground (finger actually touching the ground) after saying your cue. After several repetitions of this you can begin pointing to the ground and inch above the ground. As long as your dog still follows your hand and responds to the Down cue you may continue to increase the distance between your hand and the ground. Since you have already added your cue, your dog will likely anticipate the desired behavior and you can eventually cue your pet to lie down on verbal cue and a hand signal.
Training Tips: Always end on a good each session on a good note! Sometimes, you may not be able to get your dog to lie down in one session and you may have to mark and reward small increments. You can also use Capturing to mark and reward anytime your pet lays down on their own.
Practice having your dog lie down while you're kneeling or sitting. Try to practice while you’re lying on your back. Practice with your pet on either side of you as well, not just in front of you. We want our pet to learn that “Down” means lie down no matter what position the handler may be in.
Practice on a wide variety of different surfaces and in plenty of different scenarios. Down can be especially difficult on hard or slippery surfaces and for very large or very small dogs. Always remember to go back to step one when making things more difficult and when introducing the Down around distractions.
You can also using your reward marker to ‘capture’ every time your pet lies down on their own accord. After you mark, reinforce by placing or tossing treats on the ground between their front paws.
All Posts Fix Leash Pulling for Good
2023-02-07We all want our dog to walk calmly next to us, whether it is down a quiet back country road or on a busy city street. Our dog becomes excited with the new scents, sights and sounds. We get upset that our dog would rather be a dog than our companion at that moment. As pet parents we need to teach our dogs that giving us their attention can be more rewarding than those enticing scents and sounds. There are many ways to teach our pups to calmly walk on a slack leash and to ignore the distractions around them. Loose leash walking is not something that is mastered overnight and it does take time to be perfected. Loose Leash Walking is a relationship-strengthening exercise and never a show of who is boss. Most pet owners actually teach their pets to pull on leash. If your dog decides to pull towards something and reaches it, they just get rewarded for pulling. The next time your dog will likely pull even harder to get to that smell, dog or person. If your training is not consistent by everyone who walks your dog then the problem will never be resolved.
What you'll need: Lots of extra tasty treats Loaded Reward Marker No Reward Marker Release Cue Four to six foot leash attached to your dog's collar or harness.
The seven ways to teach Loose Leash Walking:
- Capturing- catching the dog in the moment by marking and rewarding
- Patterning- repetitive pattern to associate rewards with LLW.
- “Touch”- Using the basic obedience cue to keep our dog actively engaged in walking on a loose leash. It is also a great way to keep your dog's attention while you move past distractions.
- Be a Tree- when the leash is taught, you stop. When the leash is slack, you walk.
- Pull=Turn Around- anytime our dog pulls, give your no reward marker and calmly turn around and walk the opposite direction.
- Smell of treats- if you have smelly treats in your hand or pocket, every time your dog is close to you or passes by, just the smell of treats can entice your dog to keep close.
- Reset- introducing “heel” when the dog advances too far ahead. If at any time your dog gets more than a couple of feet ahead of you, call their name and lure them into a 'loose' heel position. It does not have to be a perfect heel with eye contact; we just want our dog to be next to us walking at a similar pace.
How to begin Pick a side that you want your dog to walk on. It does not have to be on your left, it can be whichever side you are comfortable with. Your “assurance” hand is the hand opposite of the side your dog is on and will hold the loop end of the leash.You can take in some of the slack from your dog’s leash with your assurance hand. Your treat bag should be on the same side as your dog. Always reward your dog with the same hand of the side they are on so they do not cross over you to get their reward. This hand is your treat hand and “guide” hand. If your dog tries to cut in front of you or behind you, you may straighten out your guide hand to shorten the leash and guide them to stay on one side.
Say your Loose Leash Walking cue- “Let's Go”, “Stay Close” or “With Me” and take a step. If your dog steps with you, immediately click and give your dog a treat. Make sure you give their treat close to your side from the same side hand that your dog is on. Always hand feed your dog rewards when teaching loose leash walking, do not toss them on the ground. Again, take another step. If your dog steps with you again, click and treat. Try taking a few more steps. Any time you find your pup in the perfect loose leash walking position, click and treat.
If at any time should your dog put tension on the leash and begin to pull, immediately say your ‘No Reward Marker’ and come to a slow stop. Be cautious to keep your assurance hand in the same place so you do not pull your dog. You may hold onto your belt or pocket to make sure your hand does not move. Extend your guide hand down the leash to help control your dog, being cautious to not pull them.Remember, it is your dog’s decision to pull or change direction. Once stopped, make sure to re-balance yourself. If your dog turns around to look at you, click and treat! Then begin to lure your dog back into the loose leash walking position. If your dog continues to pull, call their name one time. If still, your dog doesn’t respond you may use prompts like kissy noises or patting your leg. If your dog still does not respond you can take one steady step in the opposite direction. This will cause your dog to overcorrect themselves, giving you a chance to click and treat slack in the leash.If your dog does not respond to that and continues to pull, calmly turn around and walk in the opposite direction. As soon as your dog turns to catch up with you, click and treat.
If your dog is trying to pull towards a smell, you can use that visit itself as the reward. Click and treat while you walk past the bush or tree. Once you pass it while maintaining a slack leash you can turn, click and let them investigate whatever it is they want to access.
Continue this routine with short walks throughout the day. You can practice in your home and yard or in an empty parking lot in the beginning to keep distractions to a minimum. Pay close attention to your leash at all times. Most owners have a habit of letting their dog pull that is so ingrained; they don't even realize there is tension on the leash. From now on it is your dog's responsibility to keep the leash slack. If they pull, nothing happens, but if the leash is relaxed your dog can move towards the new dog, person, fire hydrant or whatever else they want to investigate.
With much practice and lots of consistency, this will become a habit for your dog and you won’t have to reward with click and treats more than every once in a while.
Training Tips: Begin training with a shorter leash so it is easier to control and so your dog will learn to understand pulling gets them nowhere but being close to you is extremely rewarding.
In the beginning of your walk you may start spinning in circles before you even make it to the end of the block. This is completely normal! Make sure to be patient and consistent in what you reward. Eye contact, even when passing distractions at a distance is something you should try to capture.
Always keep your assurance hand in the same spot. You can tie the leash around your waist or keep your hand in your pocket if you have a habit of pulling back on the leash or wrapping your hand. If we expect our dog not to pull, we cannot pull them.
Always reward from the hand on the same side as your dog. If you cross over your body when rewarding, your dog will cut in front of you on your walk in anticipation of the treat.
If your dog becomes too distracted try practicing in a less distracting environment, use a higher rate of reinforcement, or a higher quality of reward. Remember, we are competing with a very stressful environment. Our pets deserve ‘hazard pay’ when first working around moderate to high distractions.
Consider using a Gentle Leader, martingale collar, front clip harness, or a no-pull harness when training. Prong and choke collars can cause negative associations if not used properly. They can also desensitize your dog to pressure around their neck, causing them to pull more frequently without feeling it. Never use retractable leads or bungee leashes! They will actually teach your dog to pull while on leash.
With consistency from everyone who walks your dog, leisurely strolls can be accomplished! If your training is not consistent then the problem will never be resolved.
Dog Playtime & Socialization
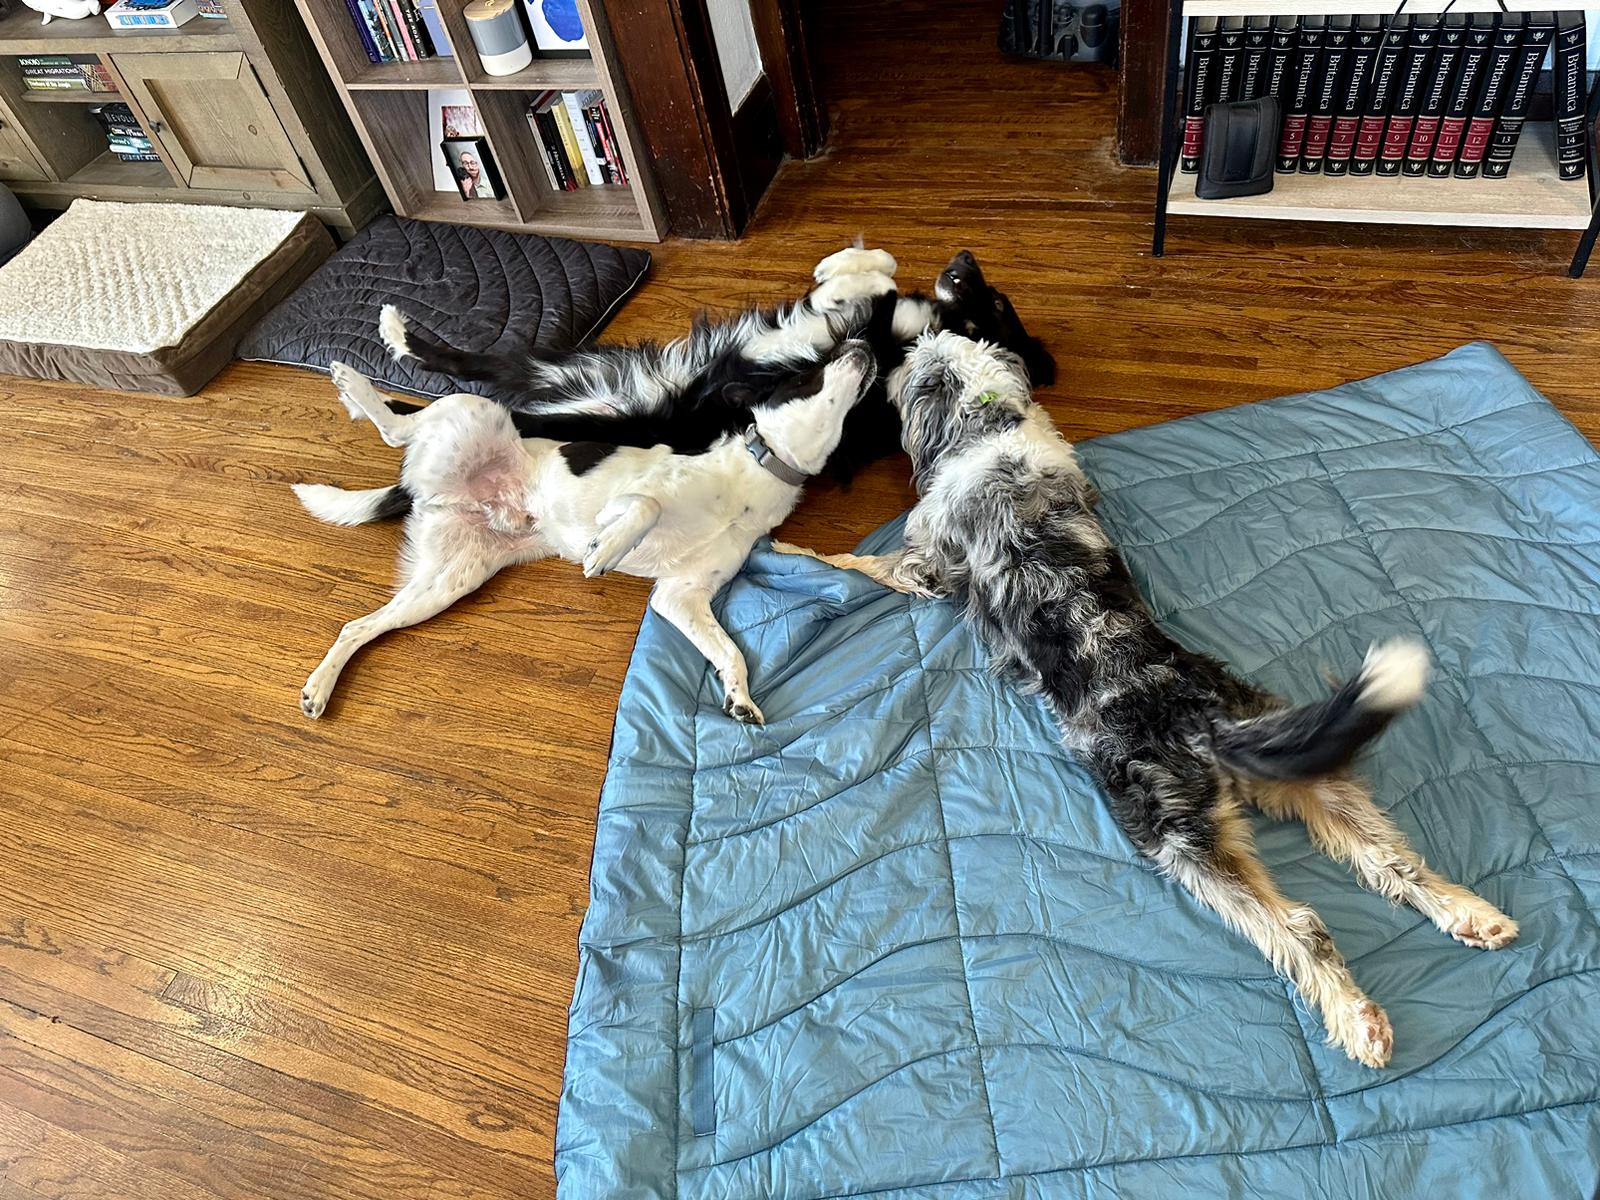
2023-02-07By definition, play is the act of engaging in a behavior with no other purpose other than fun, socialization and to satisfy a primary need. Play is used to develop cognitive function, communication skills, stress release, bite inhibition, and to see how far they can push another dog. Play can also reinforce a social hierarchy within a group.
What does proper dog and puppy play look like? The first rule of proper play is that ALL dogs must be willing participants. Play will typically only occur in a relaxed animal. Bouncy exaggerated movements, changes of direction, pawing, licking, mouthing, wrestling, open mouths, chasing, rolling around, loose body language, sharing space and lots of give and take are all examples of proper play. Most proper play is in context and includes behavior that two or more dogs agree upon. During play there should be frequent breaks. A break can be as simple as play bowing before resuming a game of chase or shaking off and getting a drink of water. Although we do like to see a 50/50 rule during play, most dogs can maintain proper play without constant role reversals. With muzzle licking and mounting there is almost never a role reversal however during chase and wrestling you can almost always see the dogs switching places.
If animals do not maintain agreeable behaviors, the playfulness of the interaction can be lost. Play and aggression are often confused as each other and in many cases humans often step in either too early or too late. This can cause frustration or reinforce poor play behaviors.
Now that we have discussed proper play and what it looks like, we can talk about inappropriate play.
There are 5 major reasons for aggression in dogs: Fear Pain Status Frustration Arousal
Each one of these are all potentially involved during play.
Precursors to problems during play: Over-arousal Increased speed Fewer pauses/breaks Increased or elevated noise Hard Stare/ Fixating- seen as a threat Freezing- assessment of a threat Stiffness in body
Different ways a dog can solicit play can potentially cause a problem with certain dogs like stalking. Body slamming may be appropriate in context but should be kept to a minimum. Some dogs don't mind leg biting during play or to solicit play but some dogs see it as rude because it is a predatory behavior similar to stalking. Many socially awkward dogs will gang up on the dog who is in the “losing role” while in a play group. Most dogs do well playing in pairs of two, called a dyad. Often when a third party tries to come join the fun, the two playing will often run off the dog trying to join in.
Common play behaviors viewed as Inappropriate: Mounting- can be sexual, status seeking, or trying to solicit play. Male-male mounting is found to be 16 times more likely than any other combination of genders while playing. This should be stopped immediately.
Bullying/Targeting- the other dog is clearly trying to get away from the situation and the playful nature is not mutual. One dog or a group of dogs may fixate and bully another dog. The dogs fixating should be redirected onto a more suitable playmate or removed from the situation if they do not stop.
Head over/paw over other dog- this is a status seeking behavior. The dog on the receiving end will usually correct the other dog, however if the dog doing this behavior will not stop when corrected, the situation can and will most likely escalate.
Leg biting- predatory behavior can be appropriate during play depending on the other dog's reaction.
Stalking- predatory behavior which can be appropriate in context but it depends on the other dog's reaction to the behavior.
Grab & Hold other dog's neck area- can be appropriate in context if the dog being grabbed is not showing any signs or stress. If the dog grabbing does a shake of their head while holding, this should be stopped immediately.
Vertical Play- when dogs are chest to chest on their hind legs. Usually this is accompanied by open mouths or “face fighting”. This should be avoided altogether because it usually leads to a rise in vocalization, growling and is also a status seeking behavior.
Head Shaking- predatory behavior and inappropriate during play no matter what body part the dog is grabbing. Typically due to over-arousal, the dog grabbing the other dog will shake their head back and forth. This can cause serious damage and stress to the dog on the receiving end. Should always be discouraged and stopped immediately.
Dog Socialization 101
2023-02-07What is socialization?
We hear this term a lot from breeders, veterinarians, trainers and fellow dog owners but what exactly does it mean? By definition, proper socialization is the act of teaching a dog not to react by desensitizing them to things they will encounter in daily life. It includes the positive exposure to many situations and environments that they may come across throughout their life. In order for any puppy to become a great adult they need to be well-socialized. Each puppy and dog must be given every opportunity to become as social as possible. For some dogs, just getting out in public occasionally constitutes proper socialization, their owners are lucky. Some breeds tend to be more difficult to socialize than others. Dogs who were bred to be naturally suspicious like many guarding breeds or ones that were made to work independently from their owners, like some terriers, usually need more work on socialization. Dogs who have not been well socialized tend to be shy and over reactive. They may startle easily by things in their day to day routines and even run the risk of becoming fearfully aggressive.
When should this be done? There are many different developmental periods for puppies. It is important to be aware of the significance of the different periods because some of the training will differ accordingly. Socialization takes place 24/7 starting at around 3 weeks old. This is the time when puppies begin to interact with their litter mates and develop bite inhibition by engaging in play with each other. This is referred to as the Primary Socialization Period. Around 6-8 weeks old is the Secondary Socialization Period. During this time, puppies are extremely impressionable by environments as well as positive and negative experiences. This leads into the Fear Imprint Period. This period typically occurs around 8-10 weeks old and again around 16 weeks of age. Harsh corrections or traumatic events that seem simple to humans can cause irrational lifelong fears or phobias for your puppy. Forcing your dog to explore something new and/or not allowing them to get away from something causing your dog stress is not recommended and should be avoided. If anything does happen which scares the puppy during this highly sensitive period, it will take some time for your dog to overcome. It is extremely important to pair any and all things your dog likes with the things they fear or had a negative experience with. Puppies that are with their littermates until 8 weeks old tend to be more well-socialized and confident. 7-10 weeks old is considered the Optimum Bonding Period for puppies. This is the best time for them to move into their forever home. In their new homes they can be given boundaries to learn what is and isn't acceptable in the human home. Puppies at this age are also most open to meeting new people, other dogs and even different kinds of animals. 7-16 weeks old is considered the General Socialization Period. While every new puppy owner should take the proper steps to socialize their new family member, it is equally if not more important to properly socialize rescue dogs as well. We typically do not know this type of dog’s personal history and genetic make-up so we must give them every advantage by socializing them properly. By making sure you do not overwhelm your dog with stressful situations and to keep everything positive, while managing their environment you will be on your way to a well-socialized dog!
How is this done? All dogs have different needs, temperaments and personality quirks. By watching for your dog's responses to new objects, people and different triggers, you can honor their request for distance or know when it is okay to let them investigate. If you do not allow your puppy to explore and continuously work them in new environments, you can risk under socialization.
-“The time your puppy is focused on you is time that he is not expanding the map of his world” --Grisha Stewart BAT 2.0-
While out on walks, you should allow investigation of new objects without pressure on the leash. You can come to a slow stop or call your puppy away if it seems like they could get into trouble. Always feel free to give praise or treats for coming back to you. When meeting new people or dogs, as they approach your dog you can tell your pet to “Go say Hi” then allow interaction to occur based on your puppy's behavior. This is optional based on what your puppy wants at the time. Under no circumstance should you force your puppy to interact with new dogs or people. Cut-off signals should be rewarded in puppies.
Things like-look aways, head turns, body turns, ground sniffing and shaking off should all be reinforced either naturally or by creating space. If your puppy turns away or looks away, you can shift your weight back to help create more space in case your puppy wants to move further away from the new person. If it seems like the puppy wants to move but feels stuck, you can happily call them back to you, so they are out of reach from the new person. If your puppy wants to move away and explore this is okay! Allow them to sniff around and if they want to go say hi again, let them. You can also help by educating children if your puppy does these things, the child should step back or turn away. Puppies have short attention spans and when they give a cut-off signal, they may just want a break from the seemingly overwhelming social pressure. You can also desensitize your puppy to noises like fireworks by playing them at a low volume and slowly increasing the volume as long as your puppy is calm.
Points to remember: Even when using positive based training methods, it is important to understand developmental periods in order to prevent any negative experiences that may haunt your dog the rest of their life.
Proper socialization is the most important thing to do in order to protect from the most dangerous behavioral problem; aggression.
By avoiding areas where other dogs go and only exposing your puppy to dogs who are known to be up to date on vaccinations you can avoid exposing your puppy to potentially harmful diseases.
Remember to use a “Socialization Checklist” to help your puppy get use to a wide variety of things they are likely to encounter throughout life.
Housebreaking Your Puppy
2023-02-07The Most Important Thing to Remember is the Golden Rule
of months old + 1 = # of hours your puppy can hold their bladder.
This means if your puppy is 3 months old, they should be able to hold their bladder for up to 4 hours. After 6 months old, your puppy should have no problem holding their bladder through the night.
When to take your puppy outside- first thing in the morning, after they eat or drink water, after playtime, after naps, after training, if you catch them sniffing around and just before bed.
Always take your puppy outside on leash and proceed directly to their designated potty spot and wait for about 5 minutes. Just as your puppy is about to go to the bathroom give your cue “Go Potty!” Reward your puppy immediately after they finish going so you do not interrupt them. You should give your puppy some free time in the backyard. Before you bring them back inside you should take your puppy back to their potty spot for another 5 minutes in case they have to go again.
You can withhold water two hours before bedtime so your puppy has a better chance of holding their bladder through the night.
Exercise your puppy sufficiently prior to bedtime to increase the likelihood they will go to the bathroom before bed and to help make your puppy tired and ready for bed.
Crate Training is often the most successful way to house train a dog. Get them use to their crate by slowly increasing the amount of time they stay in their crate. Anytime they go in their crate on their own, give them lots of praise and rewards. A dog should be able to stand up, stretch and turn all the way around in their crate, any bigger and then your puppy will have enough room to go to the bathroom on one side and sleep on the other.
If you are unable to supervise your puppies every move they should be placed in an exercise pen on in their crate so they cannot sneak off and have an accident in the house. You can also use puppy gates to limit access throughout the house. Remember, freedom is earned!
If you do catch your puppy going to the bathroom in the house, interrupt them but try not to scare them, then bring them directly outside to their potty spot. Under no circumstance should you yell at them or rub their nose in it. This will only teach your puppy to not go to the bathroom in front of you. Also, do not let your puppy see you clean up their mess. Once your dog is outside, use an odor neutralizer to clean so they cannot smell it again.
Create a schedule and you can even make a log of when your puppy was outside.
Typically after two weeks accident free your puppy is considered housebroken! Remember to give your puppy an on-leash tour whenever you bring them to a new place. Just because our puppy is housetrained in our own home, doesn’t mean they totally understand that rule applies to everyone else’s home.
Teach a Dog to Come When Called
2023-02-07The name game teaches a dog to focus on you when you say their name, so that they can get the next bit of information from the human. It is important to never use the dog's name as a correction, punishment or in an angry tone.
How to make it happen:
Say your dog's name one time then give them a treat. They don't have to look at you at this point, but they will probably look at you if you're in a quiet setting. Do several pairings of Name > Treat. Start to say it when they are not looking, then follow up with a treat.
Repeat step one in several locations, inside and out.
Start to require that your dog actually makes eye contact for their reward. Start with a 5-second 'limited hold,' meaning that if your dog looks at you with-in 5 seconds of you saying their name once, they can have the treat. You can use your reward marker when they do look at you.
If your dog doesn't look in time, just quickly walk away and take your treats with you (unless they are having fun without you, in which case you may need to make the fun stop). If they follow you, say their name without turning around to face them. They should try to come around front to see you. Reinforce that. Another option is to walk away and then just wait for about 20 seconds and try again. Either way, if they fail at the 5-Second Rule several times in a row, you're pushing too quickly. Go back to step one or work in a less distracting environment.
- Move onto the 3-Second Rule, then 2, then 1. Then the Whiplash Rule- only instant looks get treats.
There are several reasons why the game may fail:
Treats aren't good enough- find what treats or toys truly motivate your dog. Some like kibble while others some like hot dogs.
Not enough practice- Do fifteen name-food pairings each day. Surprise your dog when you can.
Repeating the name- Only say their name once, and then apply whatever rule you were using. Make some kissy noises, pat your leg, say “puppy, puppy, puppy!” if you must, but do NOT repeat their name.
Best Crate Training Tips for Puppies & Dogs
2023-02-07What you'll need: Lots of extra tasty treats Reward Marker Quiet room Appropriately sized crate A hungry dog
How to make it happen:
Place your dog's crate in a quiet room where your dog feels most comfortable.
Stock your pocket or pouch with treats without letting your dog see you do so and bring your dog into the room where the crate is located.
Start by tossing treats near the crate. After your dog eats the treats, toss a few more a bit closer to the crate. Repeat this a few times to gain a positive association to help your dog feel comfortable in the presence of their crate.
Next, begin to actually toss your treats inside of the crate, maybe just a few inches at first. As your dog steps inside of the crate give your reward marker and toss another treat in. Your dog will probably start to walk into the crate on their own after several repetitions of the previous steps. If at any time should your dog walk into the crate on their own you should mark and reward by placing several treats on the floor in the crate.
Once your dog offers this behavior you may add your cue. I like to use “Crate” or “Go to bed”. Give your cue before luring and tossing a treat to the back of the crate.
After your dog eats the treat from the back of their crate, give your marker and place another treat on the floor of the crate. Once they are done eating the treat you may give your release cue “OK!” and allow your dog out of the crate. Repeat these steps until your dog reliably goes into their crate on cue.
Auto-Sit for “Go to Bed”:
Repeat steps 1 and 2.
Next, give your cue to kennel up but do not toss a treat into the crate. Your dog should still go in with no hesitation.
Once your dog is inside and turns around lure them into a sit. Give your marker the moment your dog is in the sit position and reward with a treat.
Give your release cue and allow your dog out.
Repeat this until your dog will go inside of their crate then turn around and sit calmly before you mark and reward then release.
Build the duration of the auto sit by waiting a few moments before marking then rewarding. Slowly increase moments to seconds and then to minutes. If at any time your dog gets out of the position before being released you have probably moved too far ahead too quickly.
Once they can hold the position for a period of time you can begin to move the crate door a bit. Only touching the door at first, then moving it a couple of inches and then a little more and so on, until you can close the door all the way with your dog remaining in a calm sitting position in their crate. Again, if at any time your dog gets out of the position before being released you have probably moved too far ahead too quickly and should increase the duration of the auto-sit.
Training Tips: The crate is a great management tool as well as a safe space for your pet. You should never force your dog into the crate or use it as a punishment. Always remove your dog's collar or harness before putting them in their crate as it could be a potential safety hazard.Bones, plush toys and chews that splinter or break into large pieces should never be left in the crate and only used with supervision.Anytime your dog offers to go into their crate you should give lots of calm praise, treats or a stuffed Kong toy.
You should put your dog in their crate multiple times throughout the day for small increments while you are in the room or still home. Otherwise, you can gain the association that if your pet goes into their crate, then everyone is leaving.
Never let your dog out of their crate if they are not calm. This means no jumping, whining, barking, chewing or pawing at the door. A dog should learn that being calm and polite gets them everything.
You can feed your pet their meals in their crate if they are nervous of being in there. We want our pet to associate amazing rewards with their crate.
Do This to Keep Your Dog Calm
2023-02-07By utilizing this game, we are able to show our pets that calm behavior gets rewarded, even after getting wound up during play.
What you’ll need: Quiet room with lots of space A hungry dog Leash (6’-15’) attached to an appropriate collar or harness Extra tasty treats in an easy to reach pocket or treat pouch Practice, Persistence, Patience and Praise
How to begin: With your treats ready, attach your pet’s leash to their collar or harness and bring them into your designated training area. You should have ample space in this area to run around a bit without bumping into things.
Once in the area, ask your pet to sit. When they do say your reward marker and give them a treat.
After your pet finishes their treat say, “Go Wild!” and start to run or jump around a little. We do not want to get too crazy the first few repetitions that our pet won’t calm down. You should only do this for about a couple of seconds and move a couple of feet at first.
Next, come to a stop, bring your hands into your chest and wait a moment. Your pet should respond by eventually sitting down (since that was the behavior previously rewarded). Once they do, say your reward marker and pop a treat into their mouth.
Try it again! Repeat the same steps about 3-5 times. Your pet’s response time to freeze should start to increase by sitting faster once you come to a stop and bring your hands to your chest.
As long as your pet can calm down rather quickly about 90% of the time once you stop moving, you can advance to the next step.
With your pet already sitting, again say, “Go Wild!” and run around a bit more. Try to get your pup a bit more excited than the last few times. After a few seconds, come to a stop, bring your hands to your chest and say “Freeze!” then wait a minute for your pet to respond by sitting. Once they do, say your reward marker and give your pet a treat.
Continue this game, slowly getting more and more excited each time you ask your dog to “Go Wild!”
Start to practice this game in different areas, with different people and vary who is rewarding the dog. When playing this game with multiple people make sure that everyone freezes at the same time. When your pet responds by sitting, make sure that everyone rewards your pet, starting with the person closest to them.
We are teaching our pet several things during these sessions: Not to jump on people when excited How to calm down after being wound up How to respond to someone’s body language saying, “I don’t really love when dogs jump on me”. Calm behavior gets rewarded from everyone
Ready for Dog Training?
Tell Us About Yourself
Tell Us About Your Dog
Find Out How We Can Help
We know your dog is unique. Before making any recommendations, we need to evaluate your dog's needs.
Connect with a team member for more information